Friday, December 24, 2010

Gluing the fingerboard

IMGP0962scroll

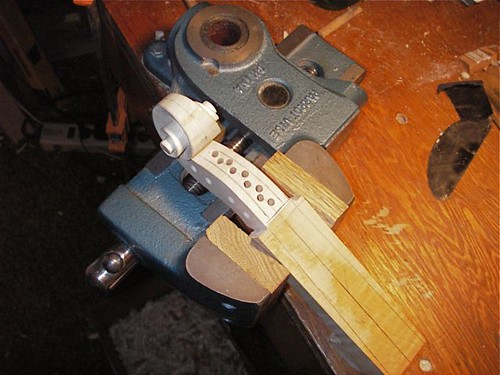
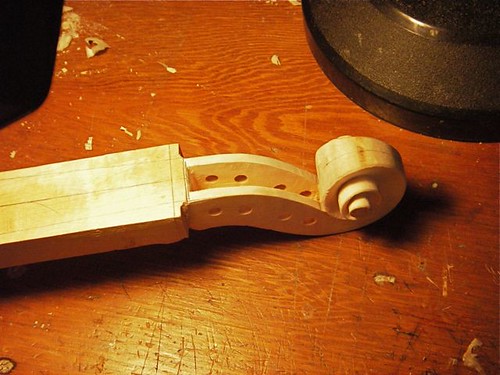
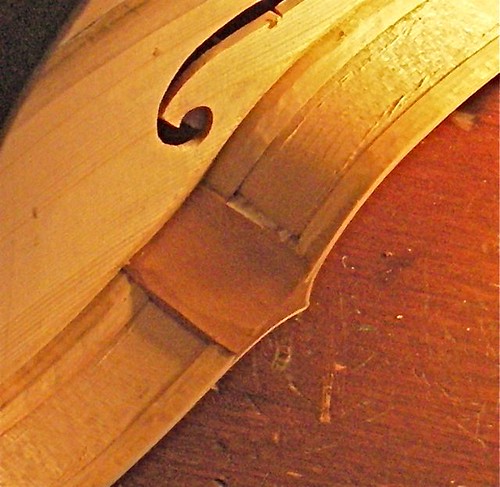
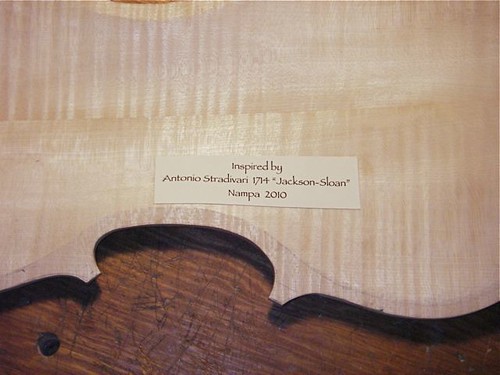
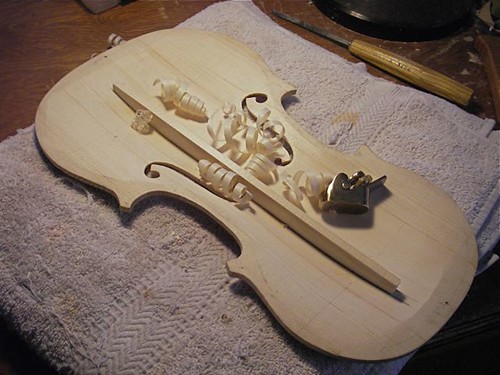
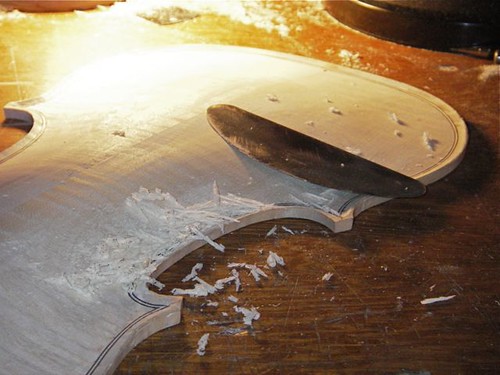
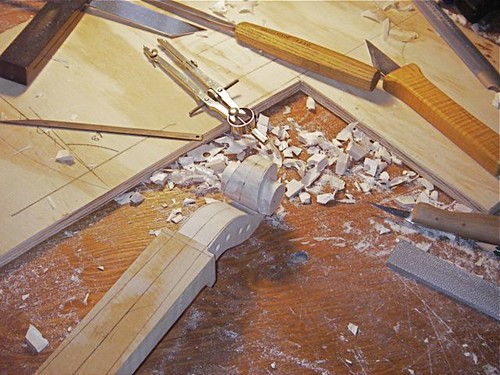
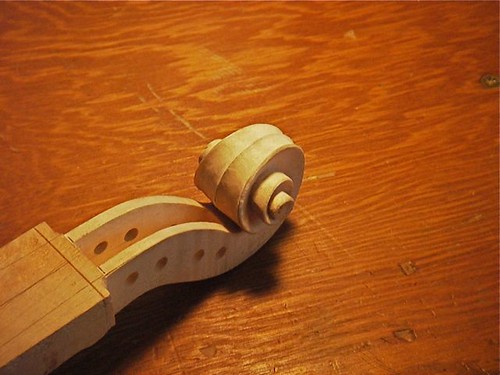
Over the past few days, amidst other projects, I started and finished the fluting around the outside of the scroll. One thing I noticed about the 1714 "Jackson" Stradivari I saw last summer was how flat the fluting was, that the sides came down quickly, the edges were sharp. I previously had thought of the fluting cross-section as a rounded trough, but seeing that particular one it was more like a rectangular trough with the bottom corners slightly filled. I tried to do something like that here.

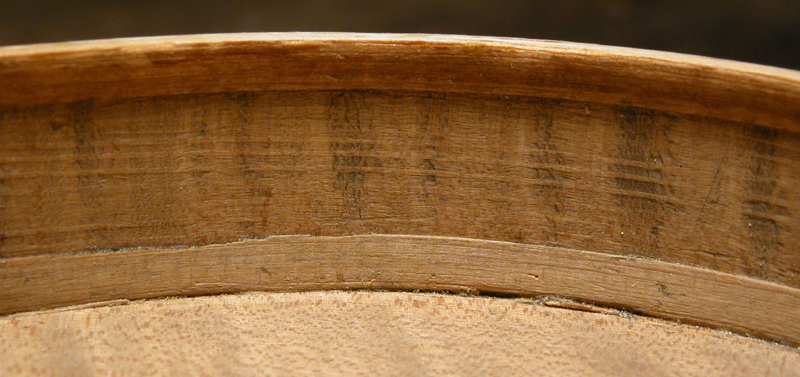
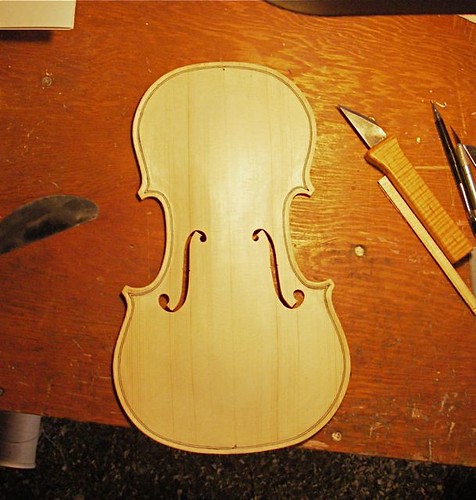
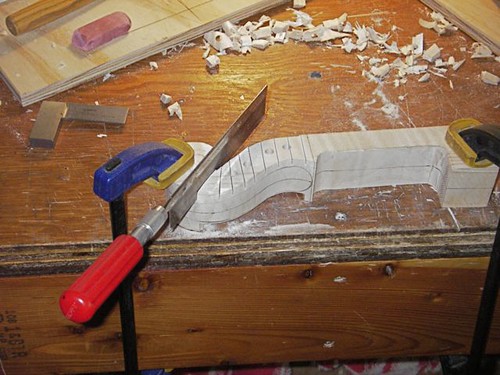
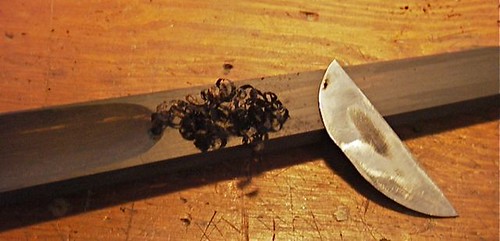
Getting the fingerboard ready for gluing on the neck, I like to scrape just a little depression down the inside center, a little space for glue to move about. I don't like the trenches one sees in older commercial instruments, and I don't think that the "X" knife cuts do much good.

IMGP0964fingerboard

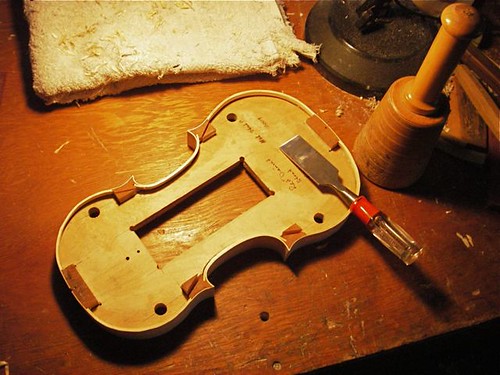
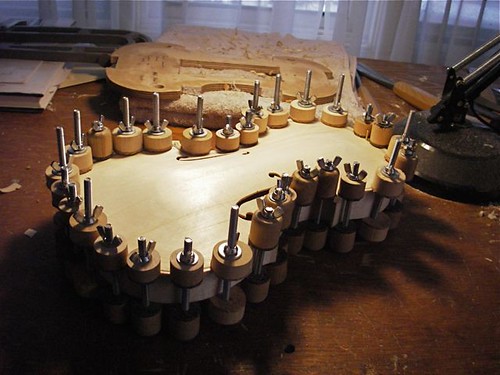
With not-so-fresh hot hide glue, I glue the fingerboard in place. The fingerboard is one of those pieces that is meant to come off, and the next person to deal with this fingerboard (possibly me, possibly someone else), would not be happy to find that I used very strong, hard-to-crack, glue.

IMGP0969fingerboard

Wednesday, December 22, 2010

Playing the contra dance with the new fiddle

Boise contradance band

For the past several Decembers, we've played the Christmas dance for the Boise Contra Dance Society. We have a lot of fun with it, throw a few Christmas tunes in the sets, and get good, happy response from the dancers. And this was the first public performance on the new fiddle, strung up last week (as described in the previous post). It worked, I could hear it, and I had no disasters. For a less-than-a-week-old fiddle, I call that a success.

Rachel sat in with us, on fiddle, and off to the right, you can just make out Dana's face -- she's playing keyboard. A fellow violin-maker, Tim Black, of Silverton, Colorado, was visiting, and got these photos with his cell-phone.

Fancy stepping

Swingin joint

Cellista julia

This last photo shows Gary, one of the callers (the other being Denise), as well as Julia on cello. You can almost see Bill on mandolin, and the left-hand of Tim S. on guitar.

And here's a shot of Tim Black and I, back at the shop, the day before the dance, holding fiddles we've made.

IMGP0946TJvisit

Monday, December 13, 2010

Strung up

IMGP0931Titian3

Strung up the varnished fiddle today, and spent a while playing it. This is the fiddle last seen here --

I have a preliminary set-up on it, and will let it settle in for a few days, making adjustments. I'll try to get a video/audio up soon.

Saturday, December 11, 2010

Hollowing the peg-box

IMGP0897pegbox

One method to start hollowing the peg-box is to drill a series of holes, with a stop to leave a minimum thickness at the bottom. I don't always do this, and don't know that it really saves much time, so I do it or not depending on my mood at the time. This is then followed by work with a gouge to remove the excess wood.

IMGP0902pegbox

The pegbox is mostly hollowed out, a little final trimming left to do, particularly at the nut end (on the left in this photo), where I'll take a bit more out after the nut is in place. Next step is to cut the fluting on the bottom and up & around the scroll.

IMGP0890linings

A look at the inside, with the top glued on. In part this is simply to show some of the internal geometry with the parts together, but also to show some of the tool marks. On this one, I'm just leaving them as is. Easiest to see, I think, are the knife cuts in the ribs when I trimmed the linings. Between those, on the c-bout rib, you can also see the toothed-plane grooves left when I thinned the wood down before bending. And you can see a few gouge marks in the corner block, where I worked it down to shape. These tool marks are removed from the outside, where they can be seen, but inside, I don't think they affect the instrument's tone or response.

Bruce Carlson has posted some nice photos of Guarneri del Gesu interiors on Maestronet, including this one, which shows some of the toothed-plane marks --


Source

.

Wednesday, December 8, 2010

Gluing the top on; Jackson-Sloan Stradivari

IMGP0865formRemoval

Following advice of Oded Kishony, I'm going to fit the neck to the body before gluing the back to the ribs. To glue the top to the ribs, though, I need to get the form out. I trimmed the linings last night, and this morning I took out the form. It appears to be a problem, but just split the corner blocks on the diagonal, knock the end and neck blocks loose, and you can spread the ribs taking the form out.

A word about the chisel with the plastic handle. It's cheap. I bought it over 30 years ago when I was doing carpenter work and carried it about in my leather work-apron. In my violin work, I find it pretty handy for scraping old hide glue and other destructive tasks. It takes a quick edge, though it doesn't last, and is the right size for splitting out blocks.

After the form is out, I trim the blocks to their final shape.

IMGP0872ribs

Here's the top glued to the ribs. Next step is to finish up the neck, then fit it.

IMGP0873glueTop

With the glue hot, I decided to add the label to the back. Here it reads: Inspired by Antonio Stradivari 1714 "Jackson-Sloan" Nampa 2010. Inspired here really means in the more artistic sense, and certainly not a copy.

IMGP0876label

This past June, at the Southern California Violin-Makers Workshop, I got to play the 1714 "Jackson" Strad, as well as a 1742 Guarneri del Gesu, both owned by Doc Bill Sloan. A tremendous experience, I was particularly taken by the Strad. I was also surprised by its appearance, being much higher arched than I would have expected out of a Stradivari. We were able to really look over these instruments, and estimated the Strad top arch at 18 mm, and what appeared to me to be very steep arching. The e-string on this Strad was simply amazing. Anyway, I tried to follow a similar arching concept, without having anything like arching diagrams, just my memory. Hence, "inspired by."

Tuesday, December 7, 2010

Shaping the bass bar

I fit the bass bar to the inside of the top yesterday, and glued it in place. Today, the fun part of trimming it down to shape. I get a kick out of running the thumbplane along the upper edge and taking off long curls of spruce.

IMGP0849bassbar

Here's the finished bassbar. This one has a somewhat higher arching than my last fiddle, which also shows up in the shape of the bar. After rounding the outer edge, I'll glue the top plate onto the rib assembly.

IMGP0854bassbar

Sunday, December 5, 2010

The Bru

Bru_LoRes

The reason I'm interested in making violins is because I like music: making, listening to, and dancing to. Here's the band I'm in, the Bru.

My daughter, starting her business as a photographer, took our photo after we performed in a St. Andrew's Day service last Sunday in Boise. In addition to the photo being taken by my daughter, the kilt I'm wearing was made by my sister, and the fiddle was made by me.

From left to right we have Bill, a long-time friend of mine, whom I've spent many a day tracking the mountains for deer and elk with flintlock in hand, Julia on cello, new to the band, and a good influence musically, myself, Dana, who usually plays piano, but occasionally graces us with her fine voice and guitar, and Tim, a piper, guitarist, whistle-playing accordionist -- pretty much anything he gets his hands on.

It's a fun group.

Saturday, December 4, 2010

Cutting f-holes

IMGP0837fhole


Spent a couple hours cutting f-holes today. I carefully layout the stems, since the terminal holes are already drilled, and then basically cut the treble side carefully until a soundpost will fit through. Then I cut the bass side. And I try to make them match. One of the discussions that often pops up on violin-making forums are whether, when following the design of a classic violin, whether one should try to copy the asymmetry present, and whether it was due to design, or error, or age. I'm not that far along. I make my design as symmetric as I can, and the asymmetries come in on their own! :-)

Thursday, December 2, 2010

Dang it!

I had started the hollowing of the back, as with the front, and then got down to the point of using my drill press to map out the basic graduation scheme. I had just seen a photo of another fellow doing the same thing, except with about a 1/4 inch drill-bit. I always had used a 1/16 or 3/32. Had a 1/8th bit in place, so left it there.


Here's my basic set-up.

GraduationDrillpress

Going around the edge, I felt the stop slip, and the drill just broke through the outside. It's the hole at about 10:30, with light showing through. The hole at the top, almost out of the photo, is the registration pin hole, and meant to be there. I think the thinner drill bit requires less downward pressure, and is therefore less likely to cause the stop setting to slip.

IMGP0761Hole

So, my first thought was to fill the hole with a dowel. Then I started thinking (a dangerous thing, really) that I wanted wood that matched better, particularly the direction of the grain. A dowel would have the grain perpendicular to the grain of the back. So I evacuated a roughly oval shaped area, found a piece of maple that had been cut-off from this back, and started to shape it to fit. The four little blocks are glued around the hole to make sure I put the patch down exactly the same way each time.

IMGP0767Fitting

After spending way too much time fitting this patch, using chalk dust to see where it touched and where it didn't, I finally got to the point that I thought it might work. Fired up the glue pot and used fresh, thick hide glue.

IMGP0778Clamp

Here's the area with blocks removed and the overhead of the patch removed. You can see the outline of the patch, but it appears solid. I didn't worry about matching the grain exactly -- the outside hole is about the diameter of a pencil lead -- but at least it's the same wood.

IMGP0788Trim

Actually, in retrospect, I might have been just as well to use a dowel.

With all that nonsense out of the way, I am now back to getting the top to its proper thickness.

IMGP0792ContinueGraduation

Saturday, November 27, 2010

Hollowing the top

After messing about with the fine removal of wood on the outside arching, I find it great fun to gouge out big chips of wood, starting the hollowing on the top.

IMGP0731hollowing

Before starting the hollowing, I layout the f-holes and drill the terminal holes on each end. This particular step takes me much more time than it should. I draw and redraw the f-holes several times before I get something I think will be ok. Once the holes are drilled, however, I'm committed.

IMGP0712f_hole

I use a simple cradle to hold the top during hollowing.

IMGP0714cradle

The hole drilled in the bench and the hole in the top match -- while arching, I use a 3/8-inch dowel in the bench to hold the top in place, yet allowing me to rotate the top easily.

After getting some of the 'meat' out of the center, I set up my drill press for a rough graduation thickness. In this case, I've set the drill to leave a thickness of about 4 mm.

IMGP0735RoughGradDepth

With the rough-graduation holes drilled, I can then again quickly scoop out most of the spruce, leaving just the 'tips' of the holes for reference. You can also see the previously drilled f-holes starting to be exposed, for example, on the lower hole next to the corner at the lower right, from this perspective.

IMGP0739RoughGrad

Switching over to the larger thumb plane, I start smoothing the rough gouging.

IMGP0740RoughGrad

Sunday, November 21, 2010

Idaho Historical Museum

My friend Bill Elmer and I have often played for events at the Idaho Historical Museum in Boise. A week ago Saturday, we played for a fundraiser auction, Adopt-an-artifact. In addition to playing tunes, we got to play a Virginia Reel and a waltz for a group of young dancers -- a reel thrill for us. :-)

The Idaho Statesman had a reporter there, and caught a photo of us playing. I remember the instant later when the flash registered. Anyway, thought I'd put it here as well, just for something different.


The photographer was Darin Oswald, and the link is here.

Friday, November 19, 2010

arching and varnishing

IMGP0659back

Down to the scraper, trying to get rid of all the little bumps and grooves on the back.

The arching is nearly finished (at least I'm thinking that now on Friday evening). Will look at them again in the morning, then turn them over and start hollowing.

IMGP0665Plates

Two varnished backs. The one on the left, the lighter color, is what I'm currently playing. The one on the right is currently being varnished -- in fact the varnish here is still tacky. I'll rub it down, then add another clear coat or two.

IMGP0641backs

Sunday, November 14, 2010

Cremona in Nampa

In violin-making, one is always faced with questions that are variations on "How did they do _____ in Cremona?"

Cremona, Italy, of course, was the town of the Amatis, Stradivari, the Guarneris, and others -- THE violin-making focus of the Universe. That was 300 years ago, though, and Cremona has changed. There are plenty of violin-makers there now, but since the time of the classical makers until fairly recently, it had forgotten its violin-making heritage in large part.

Still, we violin makers are always striving to find that 'sound' and 'look' -- although there is no single definition of either.

So today, my wife and I decided that we'd get a little Christmas shopping done. Went to the World Market store here in Nampa, Idaho. I found this in the stocking-stuffer section.

composite

For two bucks, I bought it. Tried some -- actually fairly good, though I'd say not a great value at $2 for the 4 pieces. Still, I now have a little bit of Cremona here in my shop, and think that it will only help my violin-making. It may be the secret of Stradivari!

Actually, I really am amazed and tickled to find anything to do with Cremona in Nampa. It just goes to show how connected the world has become.

Friday, November 12, 2010

Arching on one, varnish on the other

With the purfling in, I'm now to finishing up the arching, using smaller tools, taking less wood as I go. If there is any secret in violin-making, there's a good chance it's in the shape of the arching. Incidental light makes 'problems' easier to see, such as the groove at the upper end of the right C-bout -- need to take care of that!

IMGP0588back

My previously built fiddle in the varnish process. Here the layer is just on, still wet, and will be set aside for a day or two to dry before the next coat.

IMGP0573

Saturday, November 6, 2010

Purling channel (WARNING: power tool usage)

For those who have an aversion to power tools in woodworking, you'll want to avert your eyes for this. I have a Dremel tool jig for cutting the majority of the purfling channel. At the So. California Violinmakers Workshop last summer, I got to use a Fordham Rotary Tool set-up. Very nice. I'd like to get one, and may someday, but right now I have this. One thing I particularly liked was the foot-pedal power control. With the Dremel, the power control is on the machine -- really handy if you have three hands. But it occurred to me that I could build a kill-switch for the power to the Dremel to allow it to come to rest before I lifted it off the plate -- always a good time to really mess things up. So I went to the local hardware store and bought a big wall switch, a socket, a box, cover plate, and power cord.

IMGP0518parts

Here's the box assembled, with the Dremel jig plugged in. In practice, the box will rest on the floor where I can operate the switch with my foot.

IMGP0522setup

Here are the two plates with the purfling channel routed. Note that I stop short of the corners, and will finish that up by hand. Using the Dremel tool is still a stressful way to cut the channel, but it is clean and quick. It will take me longer to hand cut the eight corners and the button than it did to do this.

IMGP0527routed

I should add that's it's always a good idea to plan these things out ahead of time. It's all in the design! :-)

schematic

Friday, November 5, 2010

Cutting the scroll on one, ready for varnish on the other

My prior fiddle had gotten to the first coat of varnish, but then I really didn't like the way it was going. I stripped it, then started over again. Here it is, with the ground restored, ready to varnish again.

IMGP0514ground

On my current building project, I cut the second turn in the scroll, then started cleaning it up -- apply a chamfer, undercut, adjust.....

IMGP0507scroll

Thursday, November 4, 2010

"More and more about less and less"

IMGP0485back

Working the arching down, at the same time working the channel -- the scoop around the edge. Still a ways to go on the arching, but it's starting to look like a fiddle.

Cutting the channel around the edge of the plate, it's hard to tell how deep you are. Since I cut my plate with it sitting flat on the bench, I built a very simple height gauge.

IMGP0493heightgauge

A blunt nail is the indicator, with little black stripes (at the top, near the head of the nail) marked at 3 and 4 mm above the bench surface. When I get in that range, I can be a little more careful, and go to a more accurate caliper to finish up.

The top is still quite high, about 18 mm in the center. I want to get as much as I can, reasonably, out of this one, but my back is at 16 right now, so I still have wood to remove here.

IMGP0496plates

Thursday, October 28, 2010

Roughing the pegbox and scroll

IMGP0271neck

After laying out the lines of the neck and scroll in pencil, I start cutting away some of the excess wood. Note that the peg-holes are drilled prior to this, while the neck is still square. Here the saw is nearly done cutting the bass-side of the peg-box. It has already cut the wood from the treble side, and the gouge and rasp cleaned out the stuff. You can see the gap on the side next to the bench. It sure is handy having handtools that can work on their own with minimal direction! :-)

IMGP0280neck

Here we have the first turn in the scroll rough cut and chipped out. I then use the rasp, looking from side to side, trying to get things even. I'll call it a day, and finish up the rest later.