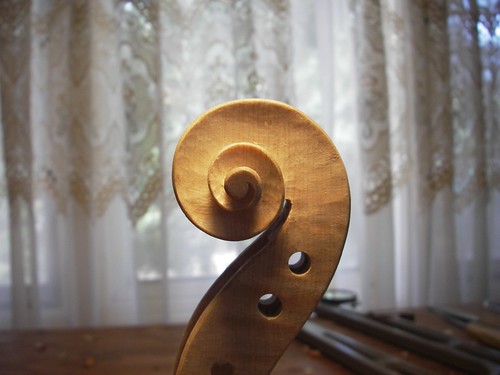
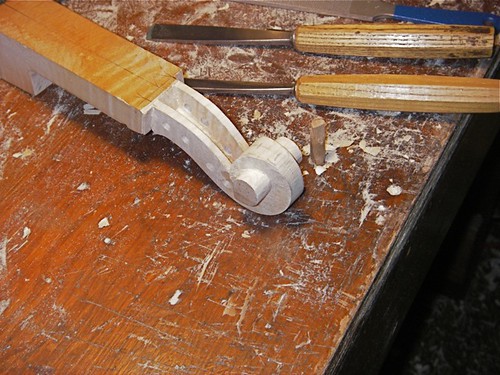
The violin scroll is that one recognizable part that everyone knows, except maybe beginning violin-makers such as myself. What does it look like anyway? To the general public, they all look the same. To experienced violin-folk, they're individual. Guarneri del Gesu's loopy asymmetric scrolls seem charming in a way the rest of us can only envy. The near perfection of Stradivari or the Amati are something we can strive for. In the meantime, those of us toiling with the scroll -- which has really no impact on the sound of the fiddle -- cut one, look at it, learn something, and resolve to do better next time.
Here's a side view of my current project, with shadows -- helps to bring out the tool marks, some of which I'll get out of the way, others I'll not see until too late or ignore because they don't bother me. Right now, there are still plenty that bother me, but I'll look at them another day.
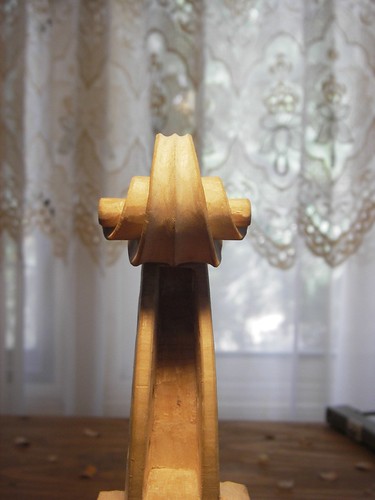
Here's a more conventional view.
Not completely finished, but I can straighten up some of the lines tomorrow.
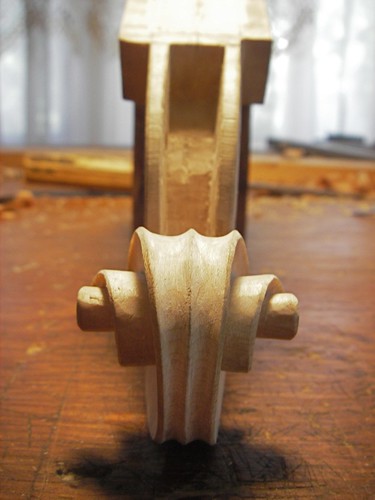
A non-typical view point for most folks, but for violin makers, you end up looking at the darn thing from all sorts of angles.
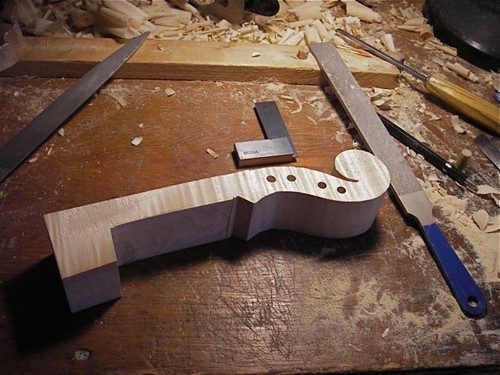
So, I'm not completely happy with it, but on the other hand, it will be ok, and now I can concentrate on the neck and fingerboard, which really is important to the player. Surprisingly, or perhaps not, but the neck is crucial. It's the one place on the fiddle that the player's hand comes in contact with the fiddle, and has a tremendous influence on the way a player views an instrument.
But visually, more people consider the scroll. Oh well...
Showing posts with label neck. Show all posts
Showing posts with label neck. Show all posts
Friday, July 6, 2012
Friday, April 27, 2012
Into this neck of the wood.
Roughing out the interior of the pegbox. This goes fairly quick, but it is a work-out. I still need to clean up the edges. Lots of curl in this wood, which means it's very easy to get tear-out where you don't want it - which means I have to resharpen tools before finishing up. But another day, I need to get back to repair work.
Following, or trying to follow, a scheme by Joseph Grubaugh and Sigrun Seifert for the Brothers Amati Scroll (Strad magazine, March 2006). I'm not sure that I am interpreting the transition from flat paper to curved surface correctly, but am plunging onward.
A bit of work to cut out the sides of the pegbox and the first turn in the scroll. This highly figured wood really likes to tear out -- lots of work with the rasp!
Saturday, March 24, 2012
Squaring a neck.
I was squaring up a block for the neck this morning before breakfast, just getting a little done while waiting for the rest of the house to get going. This was a rather plain looking block, didn't cost all that much, and didn't seem to nice -- but after removing a little wood, it had quite a nice sheen to it, as well as some nice figure.
Don't know if it will match the back I have for this one, which I think is rather plain, but the ribs are flamed, so a mongrel it will be.
Thursday, January 20, 2011
Gourd banjo, part 2, and Closing the Box
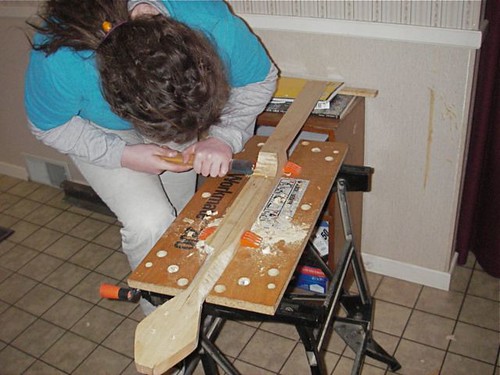
With the neck glued-up and dried, we started doing a bit of preliminary shaping to the heel. Here she is cutting in at an angle to free up the material.
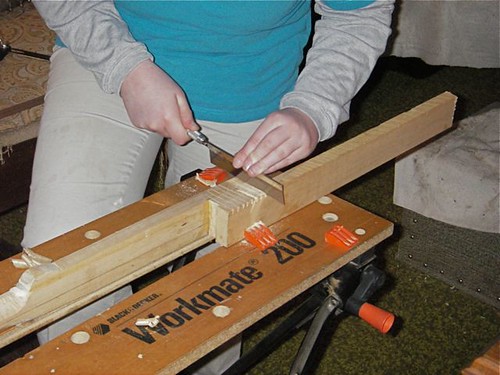
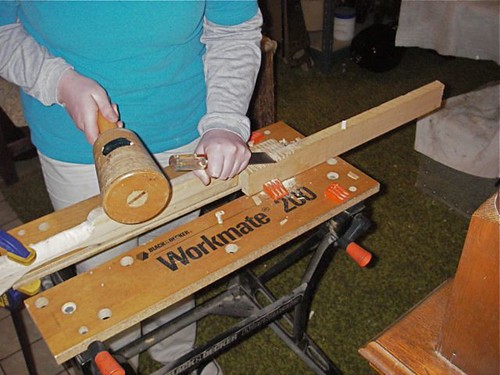
After making the cuts, we knock out the wood with a chisel and mallet. Then we clean up the sides with the chisel by hand and using a plane.
We used the lid of a small jar to mark out about a quarter-circle for the heel, sawed out similar to the method used on the sides of the heel, and here she is cleaning up the profile with a #7-sweep gouge.
Meanwhile, on the fiddle-making bench, after trimming and fitting the heel, I glued the back on this fiddle, closing it up as a box. Tomorrow, on to finishing the button on the back and heel of the neck. In this photo, the bridge (actually a blank) is simply standing in place. I had used it to double-check my neck elevation.
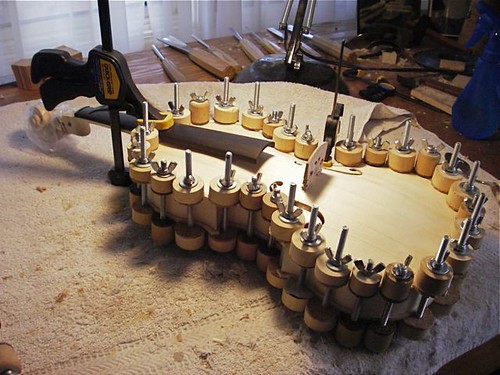
A story on these type of closing clamps was recently put out by the National Music Museum .

After making the cuts, we knock out the wood with a chisel and mallet. Then we clean up the sides with the chisel by hand and using a plane.

We used the lid of a small jar to mark out about a quarter-circle for the heel, sawed out similar to the method used on the sides of the heel, and here she is cleaning up the profile with a #7-sweep gouge.

Meanwhile, on the fiddle-making bench, after trimming and fitting the heel, I glued the back on this fiddle, closing it up as a box. Tomorrow, on to finishing the button on the back and heel of the neck. In this photo, the bridge (actually a blank) is simply standing in place. I had used it to double-check my neck elevation.

A story on these type of closing clamps was recently put out by the National Music Museum .
Tuesday, January 18, 2011
Neck set
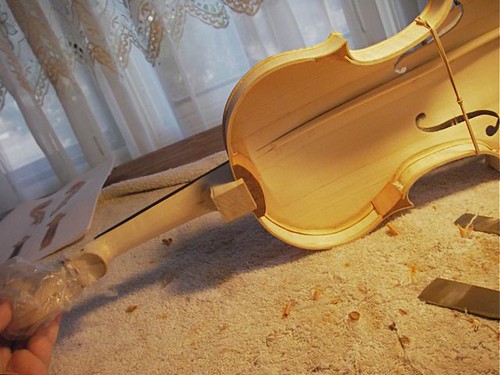
Fitting the neck to the body is a picky chore. You have to get different angles, elevations, distances to work out as you fit the heel of the neck into the neck block. In my previous violins, I have fit the neck to a totally enclosed body, top and back glued to the ribs. Following the advice of a good maker I know through e-mail and the internet, I am fitting this one before gluing the back in place.
I have to say it is much faster , so far. I haven't fit the back yet, but getting the angles, seeing what I was doing, all was much easier.
Here you can see a rubber-band around the body. It's holding a bridge blank in place, a target for my angles and elevations.
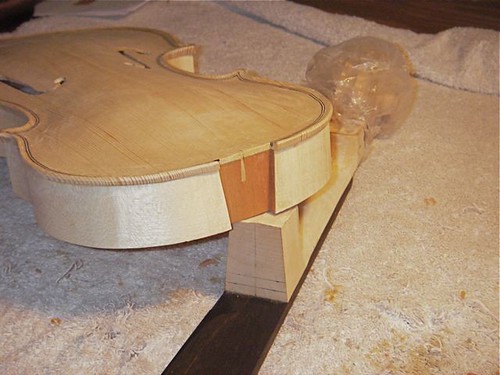
Here is the mortise cut and ready for gluing. The neck block, is the redder piece of wood, and you can see the compound angle cut of the mortise. The whiter stripe in the upper-middle of the block is the plug I used to fill the registration holes.
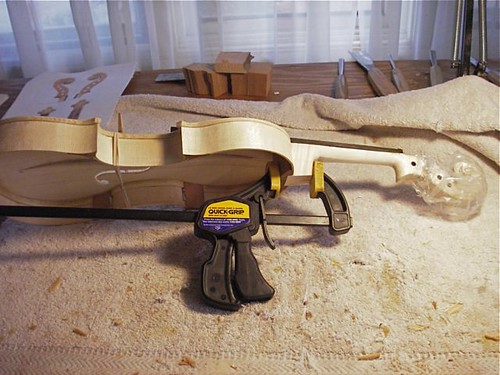
Gluing the neck was very straight-forward. In the past, I've had some difficulty keeping the elevation at the right height while clamping. Here, with my 'target' bridge in place, I can see that the fingerboard is aimed where I want it.
Friday, December 24, 2010
Gluing the fingerboard
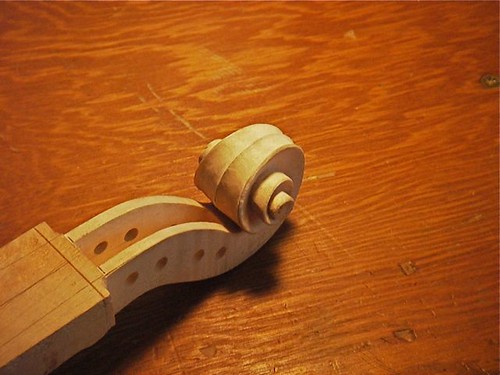
Over the past few days, amidst other projects, I started and finished the fluting around the outside of the scroll. One thing I noticed about the 1714 "Jackson" Stradivari I saw last summer was how flat the fluting was, that the sides came down quickly, the edges were sharp. I previously had thought of the fluting cross-section as a rounded trough, but seeing that particular one it was more like a rectangular trough with the bottom corners slightly filled. I tried to do something like that here.
Getting the fingerboard ready for gluing on the neck, I like to scrape just a little depression down the inside center, a little space for glue to move about. I don't like the trenches one sees in older commercial instruments, and I don't think that the "X" knife cuts do much good.
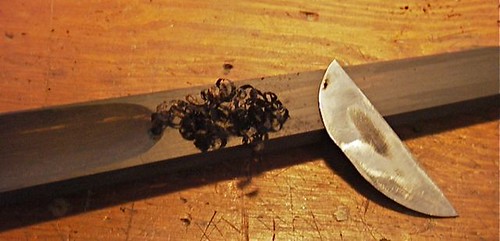
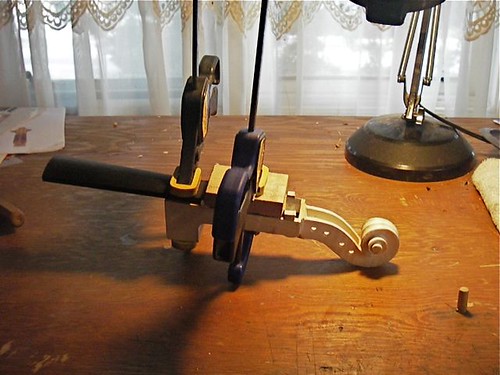
With not-so-fresh hot hide glue, I glue the fingerboard in place. The fingerboard is one of those pieces that is meant to come off, and the next person to deal with this fingerboard (possibly me, possibly someone else), would not be happy to find that I used very strong, hard-to-crack, glue.
Thursday, October 28, 2010
Roughing the pegbox and scroll
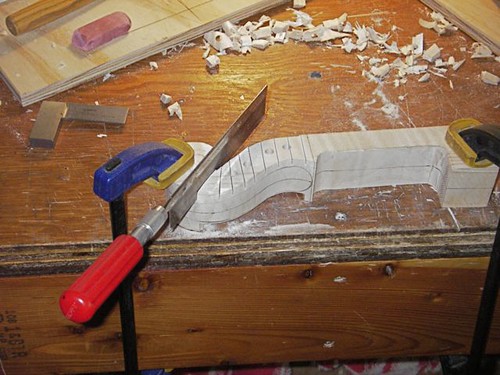
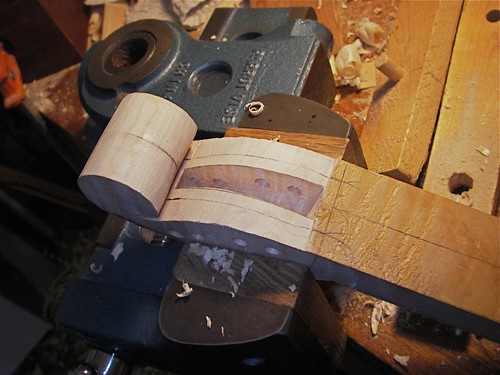
After laying out the lines of the neck and scroll in pencil, I start cutting away some of the excess wood. Note that the peg-holes are drilled prior to this, while the neck is still square. Here the saw is nearly done cutting the bass-side of the peg-box. It has already cut the wood from the treble side, and the gouge and rasp cleaned out the stuff. You can see the gap on the side next to the bench. It sure is handy having handtools that can work on their own with minimal direction! :-)
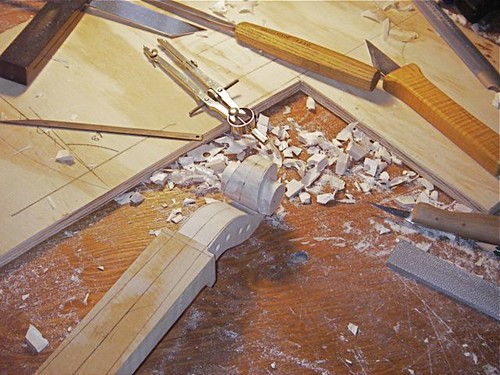
Here we have the first turn in the scroll rough cut and chipped out. I then use the rasp, looking from side to side, trying to get things even. I'll call it a day, and finish up the rest later.
Wednesday, October 27, 2010
Channeling Stradivari
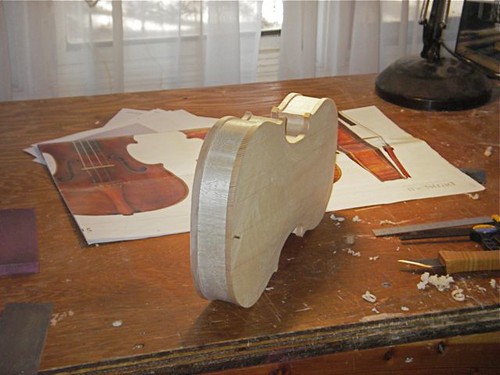
Here I am using the registration pins to attach the plates to the rib assembly. You can notice one pin sticking out of the spruce top-plate on the end facing us. Doing this allows me to see the overhang and make adjustments in an attempt to get it both uniform and flowing. At this point, the plates are still quite thick.
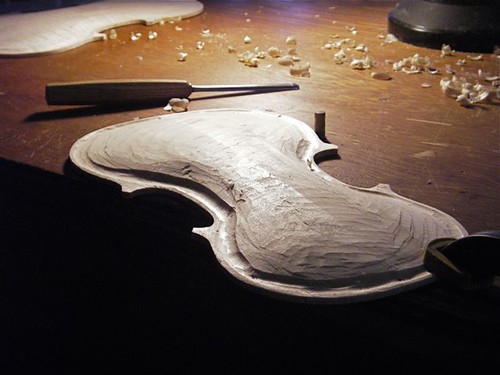
This is a time-consuming part for me. Here I have started to cut the channel in the maple back. Slow going, as I need to be careful as I bring the channel out to the edge. In this particular back plate, I have a particularly messy bit of grain in the central C-bout area, which is particularly entertaining to cut through.
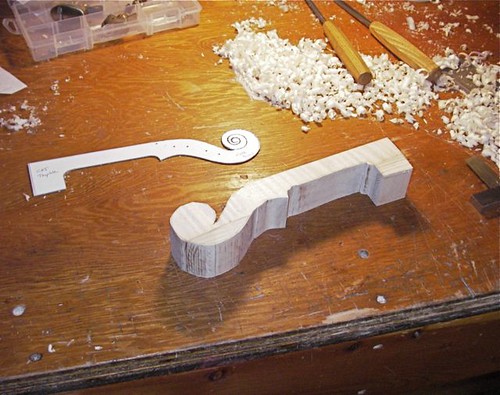
While giving my eyes a break from the channel cutting work, I squared up the neck block, traced out the template, and cut the block on my bandsaw, which is an older benchtop model, underpowered, from Sears. I have learned through experience that it is better on these necks to give a bit of clearance to the line. The blade is prone to wander a bit from vertical, lopping off wood I'd rather keep. I finish up the outline with gouges and rasps. The shavings on the bench are from work I was doing earlier on the spruce top plate.
Friday, September 24, 2010
Violin Button
Laying out the button. It's a bit bigger than I'll end up with, but it's a place to start.
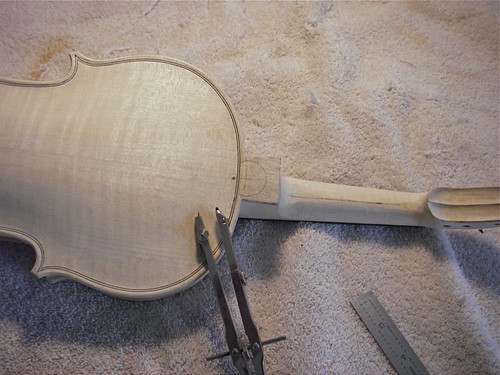
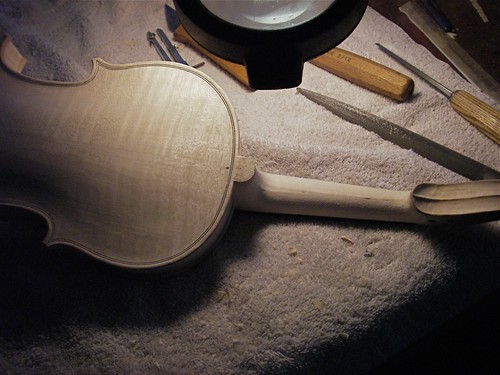
I find it tough to get the button round, follow that upwards towards the fingerboard, expanding, along the neck heel, then blending it into the neck. I have a couple templates, but much of it is done by looking at the shadows, and feeling the neck with my left hand, as if playing it.
Here is where I'm leaving it tonight. Not finished, but I want to look at it with fresh eyes next time. After this, I'll clean up the wood, then put it out to suntan a while.

Thursday, September 23, 2010
Fitting the violin neck.
Set the neck today. I think this is one of the toughest jobs in fiddle-making. You have to get the angles right in three-dimensions, with no flat surfaces to measure from. A sharp gouge, taking a little wood at a time. And, I set the angle just a little high, I hope, to account for some dropping with string tension.

Also set the saddle in place, the little piece of ebony at the other end, which supports the tail-loop that holds the tailpiece (which holds the one end of the strings).
I'll let it set in the clamp overnight, then work on finishing the button -- the extension of the back under the heel -- as well as the final neck profile.
Subscribe to:
Posts (Atom)

