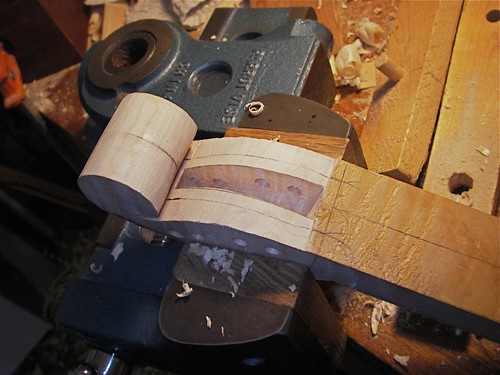
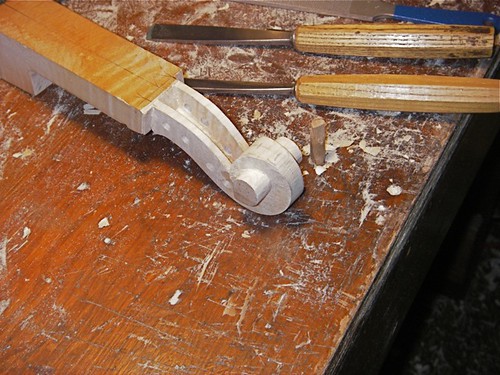
The violin scroll is that one recognizable part that everyone knows, except maybe beginning violin-makers such as myself. What does it look like anyway? To the general public, they all look the same. To experienced violin-folk, they're individual. Guarneri del Gesu's loopy asymmetric scrolls seem charming in a way the rest of us can only envy. The near perfection of Stradivari or the Amati are something we can strive for. In the meantime, those of us toiling with the scroll -- which has really no impact on the sound of the fiddle -- cut one, look at it, learn something, and resolve to do better next time.
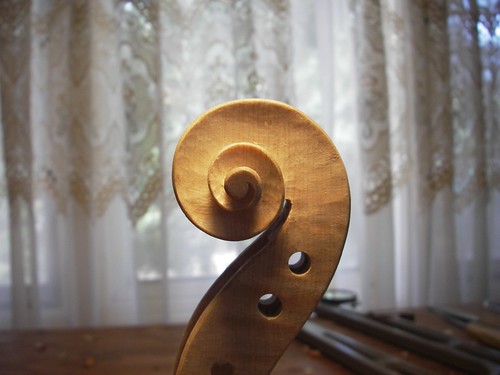
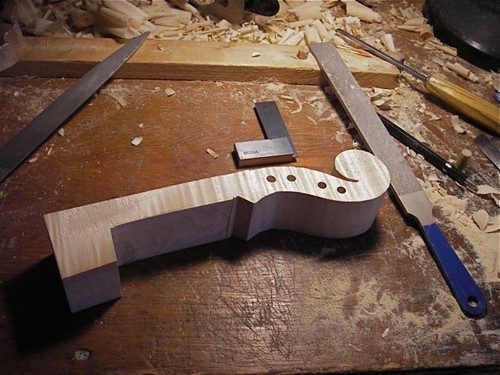
Here's a side view of my current project, with shadows -- helps to bring out the tool marks, some of which I'll get out of the way, others I'll not see until too late or ignore because they don't bother me. Right now, there are still plenty that bother me, but I'll look at them another day.
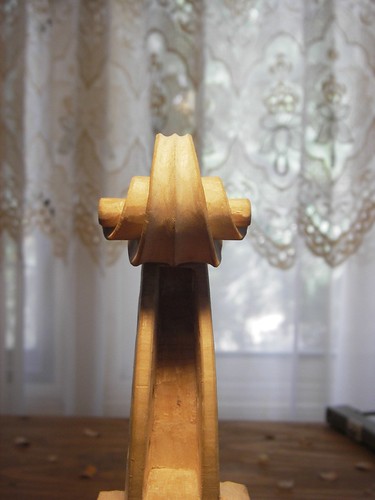
Here's a more conventional view.
Not completely finished, but I can straighten up some of the lines tomorrow.
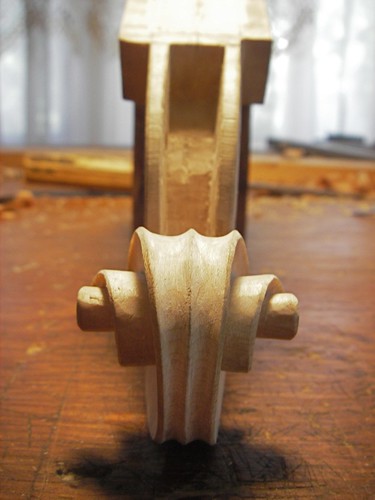
A non-typical view point for most folks, but for violin makers, you end up looking at the darn thing from all sorts of angles.
So, I'm not completely happy with it, but on the other hand, it will be ok, and now I can concentrate on the neck and fingerboard, which really is important to the player. Surprisingly, or perhaps not, but the neck is crucial. It's the one place on the fiddle that the player's hand comes in contact with the fiddle, and has a tremendous influence on the way a player views an instrument.
But visually, more people consider the scroll. Oh well...
Showing posts with label Scroll. Show all posts
Showing posts with label Scroll. Show all posts
Friday, July 6, 2012
Friday, April 27, 2012
Into this neck of the wood.
Roughing out the interior of the pegbox. This goes fairly quick, but it is a work-out. I still need to clean up the edges. Lots of curl in this wood, which means it's very easy to get tear-out where you don't want it - which means I have to resharpen tools before finishing up. But another day, I need to get back to repair work.
Following, or trying to follow, a scheme by Joseph Grubaugh and Sigrun Seifert for the Brothers Amati Scroll (Strad magazine, March 2006). I'm not sure that I am interpreting the transition from flat paper to curved surface correctly, but am plunging onward.
A bit of work to cut out the sides of the pegbox and the first turn in the scroll. This highly figured wood really likes to tear out -- lots of work with the rasp!
Wednesday, April 18, 2012
An adventure in necking.

I had hoped to be much further along, but decided instead to behave like an idiot. I am working on a Brothers Amati model, based on a form I drew following Francois Denis's method. He also has a bit on drawing the scroll, but I am also trying to make progress prior to the So. California workshop in June, so I was trying to save a little time.
I did have a Strad magazine poster of a 1666 Nicolo Amati violin, which has a very similar body to the Bros. Amati outline, so my plan was simple. Scan the scroll part of the poster, print it out, glue it on to a generic neck outline. Close enough for now.
I have a new-to-me computer. The scanner is a few years old. It works fine. I scanned the poster. Print out the scan, and it's huge. Go back to the software, adjust settings, resize the image. After 3 or 4 tries, I have it pretty close to the poster image.
This is a Strad poster from 1996.
I try splicing the scanned scroll onto the neck. Hmmm. It looks a little big. Maybe a lot big. Back to comparing with the poster. Same size. Hmmm. Finally (duh!) I turn the poster over and read the measurements.
Strad magazine has gotten a lot better on their posters over the years. I do remember, however, being cautioned that the photos are not always accurate to size and one should check the measurements against the photo.
That is actually a very good idea.
The poster's scroll was, from heel to end of the scroll, a cm longer than the real thing. Not enough for me to notice out-of-context.
So, back to the drawing-board (computer). A few more re-scaling attempts and I get something that is reasonably close. Attach it to the neck template. Glue it to thin metal. Cut it out, file down the edges.
Not enough time today to mark-out or cut the scroll, but I'm sure ready for tomorrow.
Unless some other conceptual problem pops up.
Friday, December 24, 2010
Gluing the fingerboard
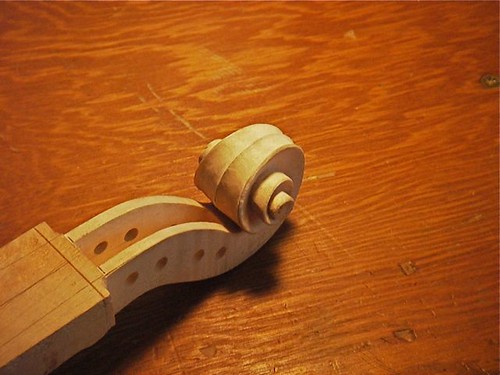
Over the past few days, amidst other projects, I started and finished the fluting around the outside of the scroll. One thing I noticed about the 1714 "Jackson" Stradivari I saw last summer was how flat the fluting was, that the sides came down quickly, the edges were sharp. I previously had thought of the fluting cross-section as a rounded trough, but seeing that particular one it was more like a rectangular trough with the bottom corners slightly filled. I tried to do something like that here.
Getting the fingerboard ready for gluing on the neck, I like to scrape just a little depression down the inside center, a little space for glue to move about. I don't like the trenches one sees in older commercial instruments, and I don't think that the "X" knife cuts do much good.
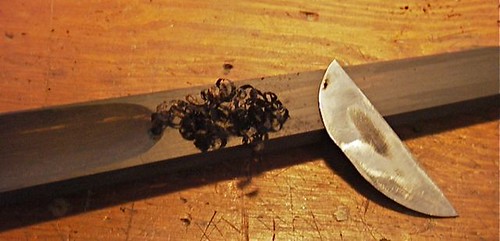
With not-so-fresh hot hide glue, I glue the fingerboard in place. The fingerboard is one of those pieces that is meant to come off, and the next person to deal with this fingerboard (possibly me, possibly someone else), would not be happy to find that I used very strong, hard-to-crack, glue.
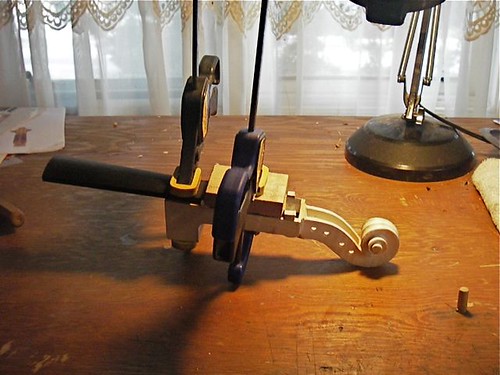
Saturday, December 11, 2010
Hollowing the peg-box
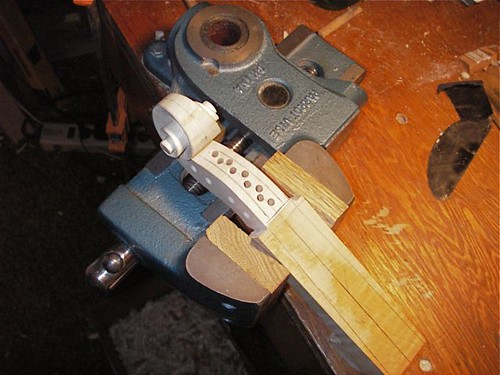
One method to start hollowing the peg-box is to drill a series of holes, with a stop to leave a minimum thickness at the bottom. I don't always do this, and don't know that it really saves much time, so I do it or not depending on my mood at the time. This is then followed by work with a gouge to remove the excess wood.
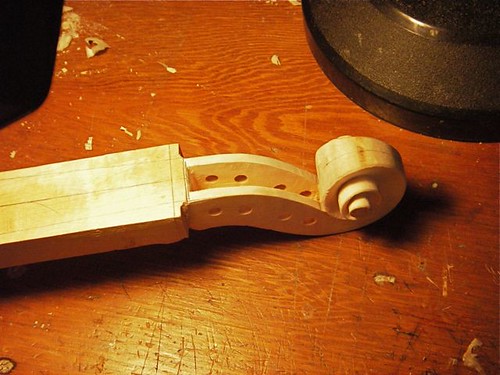
The pegbox is mostly hollowed out, a little final trimming left to do, particularly at the nut end (on the left in this photo), where I'll take a bit more out after the nut is in place. Next step is to cut the fluting on the bottom and up & around the scroll.
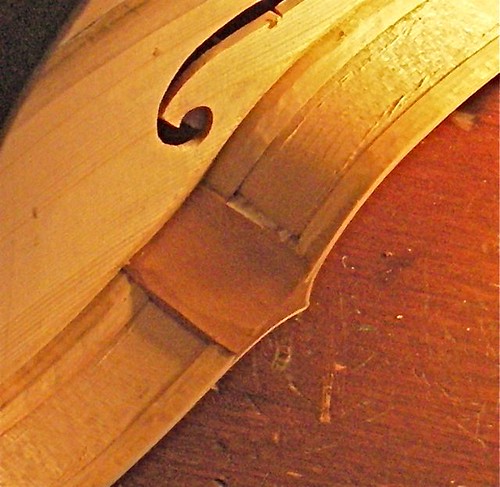
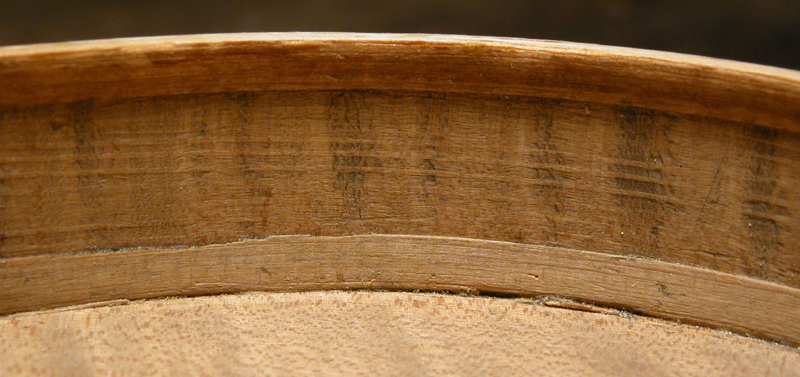
A look at the inside, with the top glued on. In part this is simply to show some of the internal geometry with the parts together, but also to show some of the tool marks. On this one, I'm just leaving them as is. Easiest to see, I think, are the knife cuts in the ribs when I trimmed the linings. Between those, on the c-bout rib, you can also see the toothed-plane grooves left when I thinned the wood down before bending. And you can see a few gouge marks in the corner block, where I worked it down to shape. These tool marks are removed from the outside, where they can be seen, but inside, I don't think they affect the instrument's tone or response.
Bruce Carlson has posted some nice photos of Guarneri del Gesu interiors on Maestronet, including this one, which shows some of the toothed-plane marks --
Source
.
Friday, November 5, 2010
Cutting the scroll on one, ready for varnish on the other
My prior fiddle had gotten to the first coat of varnish, but then I really didn't like the way it was going. I stripped it, then started over again. Here it is, with the ground restored, ready to varnish again.
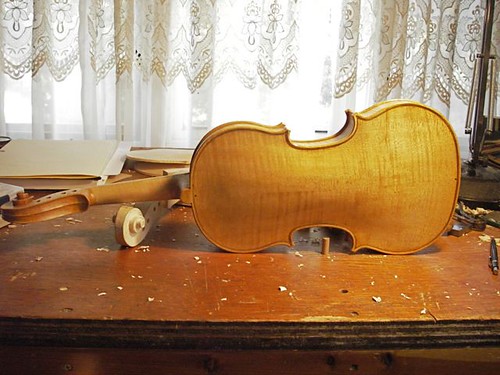
On my current building project, I cut the second turn in the scroll, then started cleaning it up -- apply a chamfer, undercut, adjust.....


On my current building project, I cut the second turn in the scroll, then started cleaning it up -- apply a chamfer, undercut, adjust.....

Friday, November 6, 2009
Finishing the pegbox and scroll
With the box closed, it's time to get the neck ready. First to finish the pegbox and scroll. Here's the neck, cut-out of a block with a bandsaw, shaped with files and knives.
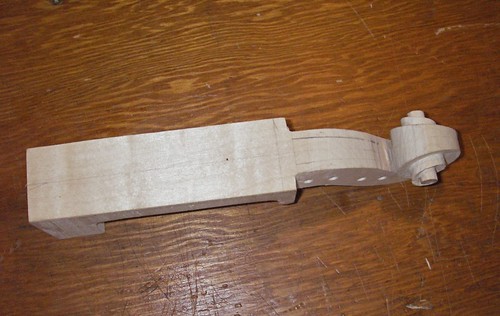
Then it's time to clean up the scroll, undercutting the volute, and adding a chamfer to the edges.

I've laid out the centerline earlier, before cutting, and it needs to be refreshed from time to time. The pegbox, the hollow area between the walls, where the strings wrap around the pegs, needs to be hollowed out. I use a drill-press to make a series of holes, with the depth set to avoid drilling through the bottom.

I start with a narrow "U" gouge and remove the wood rather quickly. One needs to be careful near the walls, as this maple is highly figured and it's easy to tear-out. With most of the wood gone, I then move on to a variety of gouges to clean it up. It is quite hard to get under the scroll, near the A-peghole, so there I alternate between a curved palm gouge and a thin flat gouge.

The fluting then needs to be done. This is the double channel you see wrapping around the outside of the scroll. With the centerline clearly marked, I use the small palm gouge to make a double track up each, merging into one at the narrow places. These initial tracks are joined by carving with a larger gouge, all the time trying to keep the centerline sharp and straight, and the edges safe for errant slips.


We are so lucky these days to have access to good information on classic violins. In the background of the previous photo, you will not the February 2009 issue of Strad magazine, with a much larger-than-lifesize photo of the scroll on the cover. To the right, is the poster of the 1715 "Titian" Stradivari violin, again from this same issue. By constantly checking the photos and looking at your carving from various angles, you at least have a chance of getting something reasonable.

Then it's time to clean up the scroll, undercutting the volute, and adding a chamfer to the edges.

I've laid out the centerline earlier, before cutting, and it needs to be refreshed from time to time. The pegbox, the hollow area between the walls, where the strings wrap around the pegs, needs to be hollowed out. I use a drill-press to make a series of holes, with the depth set to avoid drilling through the bottom.

I start with a narrow "U" gouge and remove the wood rather quickly. One needs to be careful near the walls, as this maple is highly figured and it's easy to tear-out. With most of the wood gone, I then move on to a variety of gouges to clean it up. It is quite hard to get under the scroll, near the A-peghole, so there I alternate between a curved palm gouge and a thin flat gouge.

The fluting then needs to be done. This is the double channel you see wrapping around the outside of the scroll. With the centerline clearly marked, I use the small palm gouge to make a double track up each, merging into one at the narrow places. These initial tracks are joined by carving with a larger gouge, all the time trying to keep the centerline sharp and straight, and the edges safe for errant slips.


We are so lucky these days to have access to good information on classic violins. In the background of the previous photo, you will not the February 2009 issue of Strad magazine, with a much larger-than-lifesize photo of the scroll on the cover. To the right, is the poster of the 1715 "Titian" Stradivari violin, again from this same issue. By constantly checking the photos and looking at your carving from various angles, you at least have a chance of getting something reasonable.
Subscribe to:
Posts (Atom)

