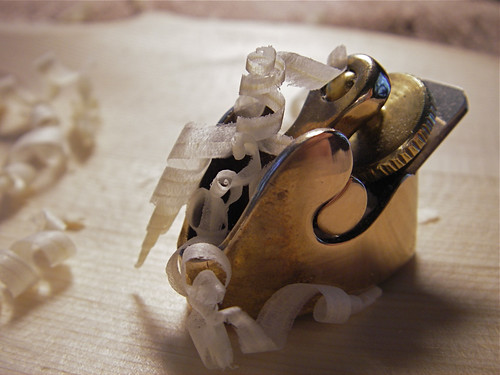
With the outside pretty much done, it's time to finish the inside of the top. I use a big-sweep gouge to remove most of the stuff, and this goes fairly fast. Then onto thumb-planes of decreasing size. At the end, you're removing fairly thin shavings. This thumbplane has a sole length of 28-mm, or about an inch and an eighth.
I use a graduation-punch modeled after the one in the Stradivari Museum in Cremona to mark the final thicknesses. Here, the punch is a 16d nail sharpened on a grinder and the anvil is a carriage bolt with a wing-nut soldered on to allow up and down adjustment. You simply put the plate in the center, against the anvil, and lower the upper arm to press holes to the proper depth.
As we get thinner, we can use light to look for uneveness.
It's a little-known fact that Stradivari invented the incandescent lightbulb for this very purpose. At least, that's what I've heard from some violinmakers, but further research has shed some doubt an that attribution. At the very least, bright light is a good tool on new wood. The two dark bands here are stripes of denser wood showing up more and more prominently as I proceed. Wood -- you never know exactly what to expect.
When the inside is finished, the bass-bar material is then fit to the surface. Once the fit is done, it is glued in place with hide glue. Here I am using simple, old-fashioned clamps to hold the bass bar in place.
After the glue has set, the bassbar profile can be shaped.
With that, the insides are done. Next is to shape the edges, then glue the top onto the rib assembly.
Showing posts with label bass bar. Show all posts
Showing posts with label bass bar. Show all posts
Wednesday, July 4, 2012
Monday, October 31, 2011
Under the top of the 1989 fiddle

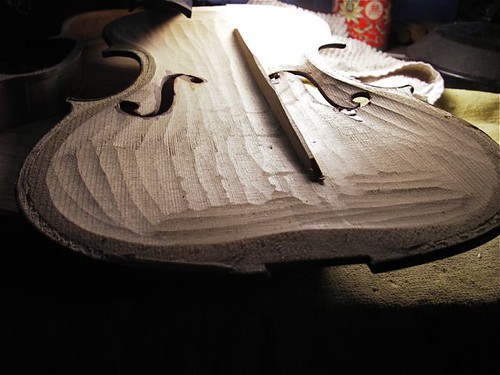
The results of repeatedly adjusting a soundpost that doesn't fit -- damage to the spruce top. I've removed the bass-bar, here on the right side of the photo. You can also see the pattern of the sander/router marks left when the plate was hollowed at the factory, as well as the staining around the edges of the f-hole during blacking. These instruments were fit with cleats at the factory at each wing, to help prevent cracking, on would assume.
The router or sander marks are part of a tradition in these low-end student instruments. Before the machines were cheap and manageable, folks used gouges, quickly.
Labels:
bass bar,
f-holes,
graduation,
repairs,
Student instruments,
violin repair
Tuesday, October 4, 2011
Shocked, shocked to find deceptive practices....
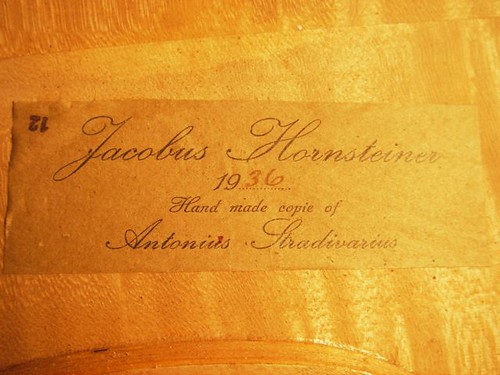
Looking over a fiddle, a bit beat-up, but with a back of nice wood, decent aged looking. You peek through the f-hole and see a very nice label. Pre-WWII, possibly German ("Hornsteiner"), possibly French ("copie"). Ooh la la -- very interesting.
Turns out, however, that that very interesting back and label are hiding a roughly hewed top, integral bass bar, fake lower blocks, no upper blocks. A cheap student instrument.

Well, anyway, we'll clean up this top, put in a real bass bar, and maybe have something of a fiddle -- but only after a decent amount of work.
Labels:
bass bar,
repairs,
Student instruments,
violin repair
Tuesday, December 7, 2010
Shaping the bass bar
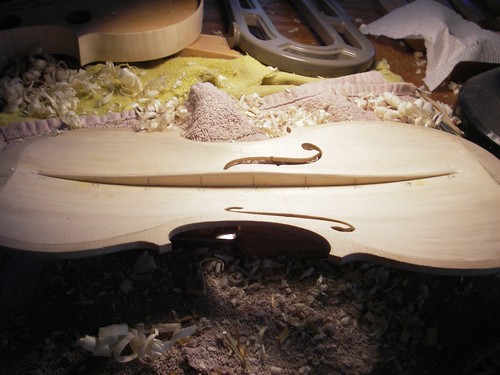
I fit the bass bar to the inside of the top yesterday, and glued it in place. Today, the fun part of trimming it down to shape. I get a kick out of running the thumbplane along the upper edge and taking off long curls of spruce.
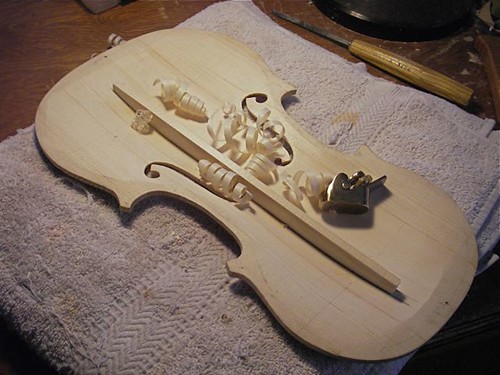
Here's the finished bassbar. This one has a somewhat higher arching than my last fiddle, which also shows up in the shape of the bar. After rounding the outer edge, I'll glue the top plate onto the rib assembly.


Here's the finished bassbar. This one has a somewhat higher arching than my last fiddle, which also shows up in the shape of the bar. After rounding the outer edge, I'll glue the top plate onto the rib assembly.

Thursday, November 26, 2009
A bass-bar and family history
Thursday, October 29, 2009
Fitting the bass bar
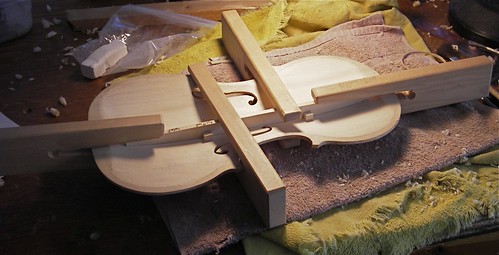
With the top to its final graduation, it's time to fit the bass bar. To keep the top from flexing, I clamp it onto a simple frame made of plywood.

Prior to clamping it on the frame, I laid out the position of the bass bar, and glued temporary studs to help me put the bar down in the same place each time. It needs to be fit to the curvature of the top.

After planing the bass-bar blank to its final thickness, I start out fitting by eye, then use carbon paper (ink-side up), then go to chalk for the final fit. Once it is fit, I glue it into place with hide glue. I'd like to have a few more clamps, and will have to get serious about making some -- more of them, and smaller. But for now, this works.

After letting the glue dry overnight, I take the clamps off, trim off the temporary studs, and layout the profile.

Using a large flat gouge to clear off most of the overhead -- needed with the clamps and frame I use, I then go to fingerplanes and finally scrapers to shape the bass bar.


Prior to clamping it on the frame, I laid out the position of the bass bar, and glued temporary studs to help me put the bar down in the same place each time. It needs to be fit to the curvature of the top.

After planing the bass-bar blank to its final thickness, I start out fitting by eye, then use carbon paper (ink-side up), then go to chalk for the final fit. Once it is fit, I glue it into place with hide glue. I'd like to have a few more clamps, and will have to get serious about making some -- more of them, and smaller. But for now, this works.

After letting the glue dry overnight, I take the clamps off, trim off the temporary studs, and layout the profile.

Using a large flat gouge to clear off most of the overhead -- needed with the clamps and frame I use, I then go to fingerplanes and finally scrapers to shape the bass bar.

Subscribe to:
Posts (Atom)

