
With the inside surface flat, I can lay the rib assembly against it and trace out the overhang.

Using a coping saw, I cut out the rough outline, except for the c-bouts. I'm not clever enough to get in there all in one pass, at least not yet, and I'd rather not break off a corner at this stage.
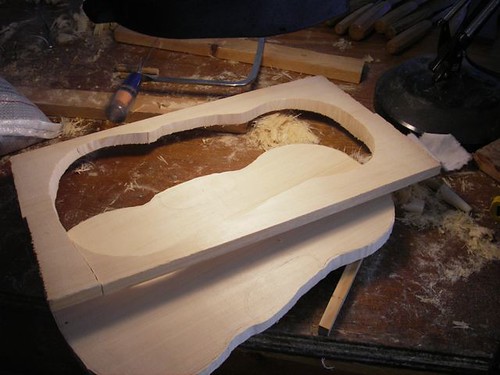
Using clamps and a bag of bird shot, I can finish cutting out the c-bouts and start to clean up the edges with a rough rasp.

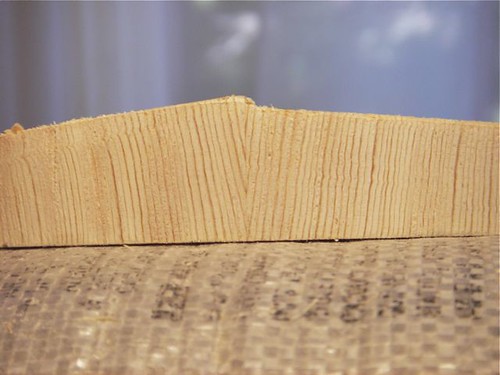
Following the advice of Michael Darnton, I flip one side of the spruce. The idea is that you get a stronger piece of wood, with the grain lines more perpendicular to the surface. I haven't actually measured this but I like the idea. Here, with the full thickness of the spruce, you can see the pattern --
\\\\\\\\\|//////// (the | is the glue joint)
--- that one gets with this method.
Without flipping, you get
//////|////// or \\\\\\|\\\\\\\ .
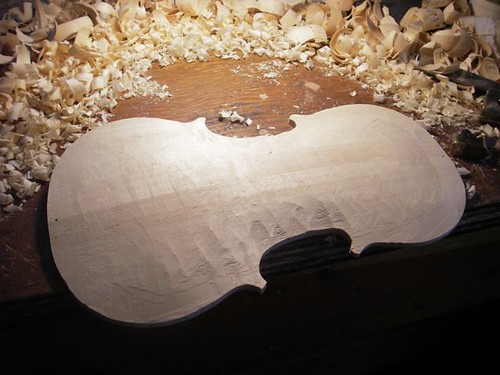
With a big gouge, it's great fun to remove big curls of spruce, getting down more to something violin shaped.

A little work with some thumb planes, and we start to get a nicer surface.
Cut a relief cut or two into the C-bout, then continue around with your coping saw. Throw caution to the wind, push the envelope without fear of a paper cut.
ReplyDeleteStephen
But I want the perfect 'negative', so can't have any relief cuts!
ReplyDelete:-)