Monday, September 19, 2011

Amati Bros, part 5


Cleaned up the edges to an acceptable level, then made the block cut-outs and drilled the clamp holes. This is essentially the end of the process for the form. Next step is to fit the blocks, then the ribs. The ribs will determine the top and back outline.

Friday, September 9, 2011

Amati Bros, part 4


On to making the mould itself, first step is to get the template on the wood, in this case good grade birch plywood, and trace around it.


I think the outline looks good; now to see if I can get it cut out as well.


With bandsaw, rasps, knives, planes, I manage to get the outline to near the scribe line. It's the end of the day, so I'll finish it later, trying to get all the edges square and the curves flowing. The corners will be cut out to receive the blocks, as will notches at the end and neck.

Thursday, September 8, 2011

Amati Bros, part 3


I glued a copy of my drawing onto a thin sheet of metal, intending to cut out a half template. As I got working on it though, I decided to keep it a full template, and make a half-template of the 'better' side, whichever that was. So far, I've kept it to a full-template.

In his book Traite de Lutherie, Francois Denis writes of this Brothers Amati form: "This model is particularly noteworthy because it has been a major source of inspiration for all instrument makers after Nicolo Amati, son of Hieronimus Amati, who used it extensively himself."

I happen to have the December 1996 issue of The Strad magazine which has a poster of a 1666 Nicolo Amati violin with photos at full-size. I thought it would be interesting to compare this drawing (which I made following Denis' book) to the poster. It wasn't bad, at least to my eye.


Sunday, September 4, 2011

Amati Bros, part 2


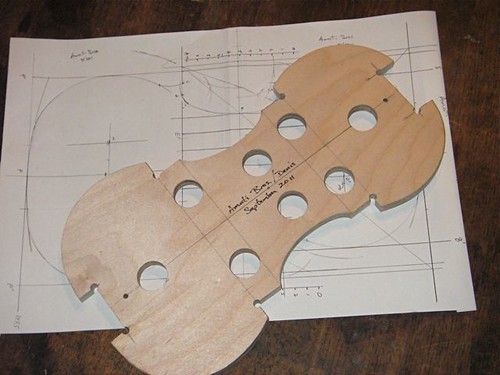
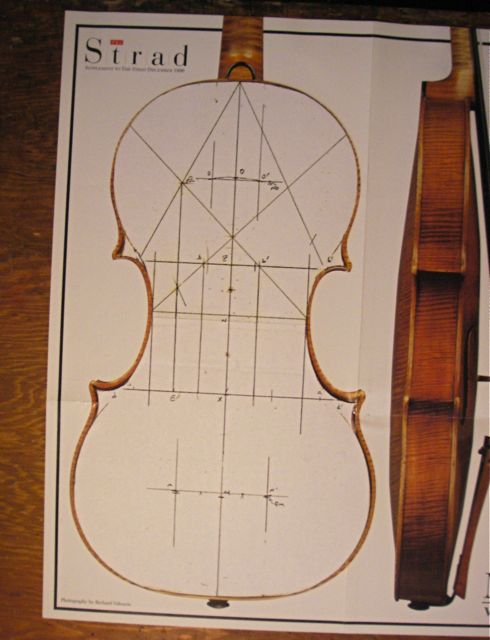
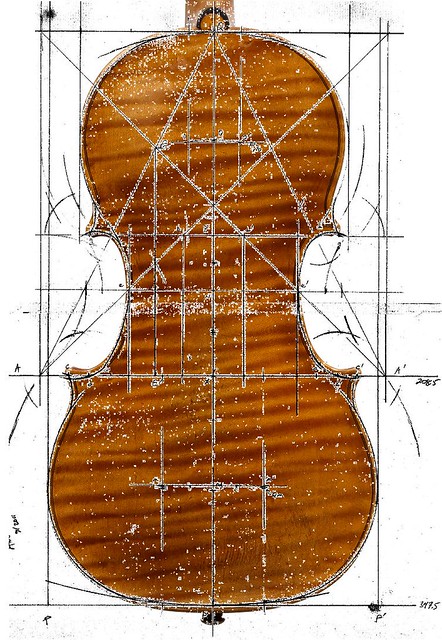
I finished the drawing following the instructions in Fr. Denis' book, and here it is, overlaid on the back of the Amati Bros. violin featured on the Tarisio.com site.

Couple of cautions -- I scanned the sketch in two pieces, and there is a slight rotation problem between the two (upper and lower). I also had to really change the black-point of the sketch to get it to show in contrast to the background, which makes it a noisy image. Also, I had to scale up the Amati Bros/Tarisio image to 353 mm, the reported length of the back. I have no idea what type of distortions there might be in the original photo, nor how that might be magnified in my enlargement. So in many ways, I'm really shooting in the dark. I don't have too many authentic Amati Bros violins come into my shop to give me a better feeling for the design.

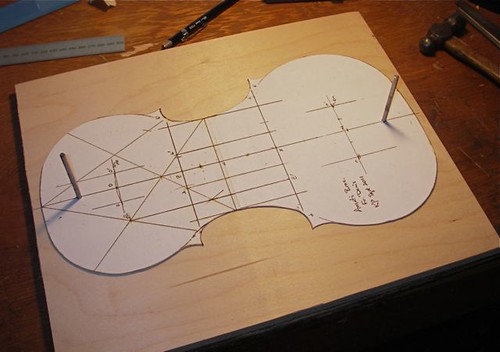
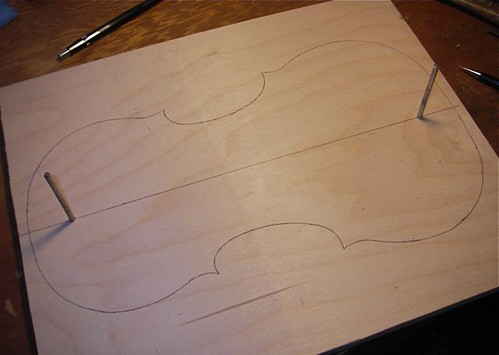
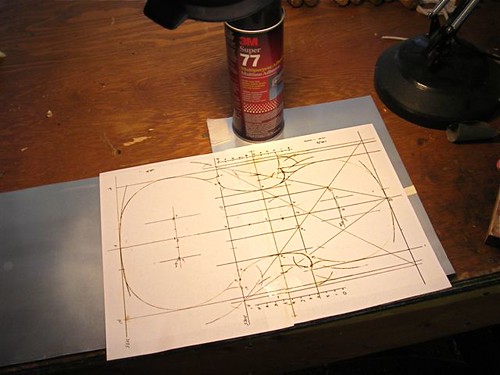
Note also that this overlay of the drawing is done on my computer in a simple image-processing program (Appleworks for Macintosh computers) and wasn't done in real life. What I do in real life is hold the two pieces of paper up against an outside window and move them about until I get the fit I like.

That said, I am fairly happy with the way the length and vertical marks came in -- the location of the corners, wide spots on the upper and lower bouts, mid-point of the c-bouts. If this mould drawing were really accurate to this violin back, the outline should lie basically on the purfling, with the exception of the corners where we expect some deviation. What I see, however, is that this drawing actually lies outside the upper and lower bout widths. So that's not great.

I'll also add I had to fudge the upper corner. I just couldn't figure out from Denis instructions how to place that recurve from the upper bout to the corner. Following the instructions -- as I understood them, I got something that was clearly wrong. Looking back through previous examples, trying things, still didn't work for me. I finally basically split the difference and drew them in.

Saturday, September 3, 2011

Amati Bros, part 1


I've been fairly busy lately, with a rush of back-to-school instruments and I've started teaching a math class at the local community college. It's a 'holiday' weekend, however, and I'm feeling the desire to do something new in making. Recently I noted an Amati Brothers violin on the Tarisio.com site that I liked. Downloaded the images ("A FINE ITALIAN VIOLIN BY ANTONIO & GIROLAMO AMATI, CREMONA, EARLY 17th CENTURY") and scaled them to size. Then pulled out my copy of Francois Denis' _Traite de Lutherie_ and commenced to drawing an Amati Brothers form, following, as best I can, his directions. I've tried drawing this one before, with less than success, but have since attempted others and have gained experience in the technique. So far, this one is working, or at least the curves are coming together. It is a somewhat complicated method. And the width of the lower bout is too wide for the image I have. But it is something to do.